Showing posts with label Recipes. Show all posts

Sunday, 18 January 2015

Roman Borscht


Beetroot based borscht has been staining clothes for centuries, but could it be that this Slavic soup actually has more Mediterranean origins?  An Apician recipe titled 'Varro Beets' suggests that the answer to this question might just be a rather surprising yes!

The Roman recipe is nestled amidst a number of others described as 'digestive aids', reflecting the fact that in the ancient world there was a strong link between food and medicine.  Also of interest is the dish's name - Varro Beets.  It could well be the case that this recipe is named after Marcus Terentius Varro, a Roman agricultural writer who undoubtedly had countless encounters with the beet.

Whilst I have served this dish as a soup, the Apicius recipe by no means says that this must be done - rather, we are told that the liquid makes good drinking, something which suggests that it isn't usually included in the final dish.  If this is so, then perhaps it isn't right to call this 'borscht' after all.  However, in both appearance and taste, the 'liquid' is incredibly close to the aforementioned Eastern European soup.  I'll let you decide!

Chicken and Beetroot Soup
(Serves 2)

"For Varro Beets, take black beets and clean the roots well.  Cook them with mead and some salt and oil.  Boil them down until the liquid is saturated - this liquid makes a nice drink.  It is also nice to cook a chicken with this." - Apicius, 3.2.4


Ingredients


  • 3 Raw Beetroot
  • 1 Chicken Thigh
  • 500ml White Wine
  • 500ml Water
  • 100g Honey
  • 2 tbsp Olive Oil
  • Salt and Pepper


Methods


  • Begin by adding the wine, honey, oil and water to a saucepan.  Add the chicken thigh too, then turn on the heat.  This is the stock for the soup.
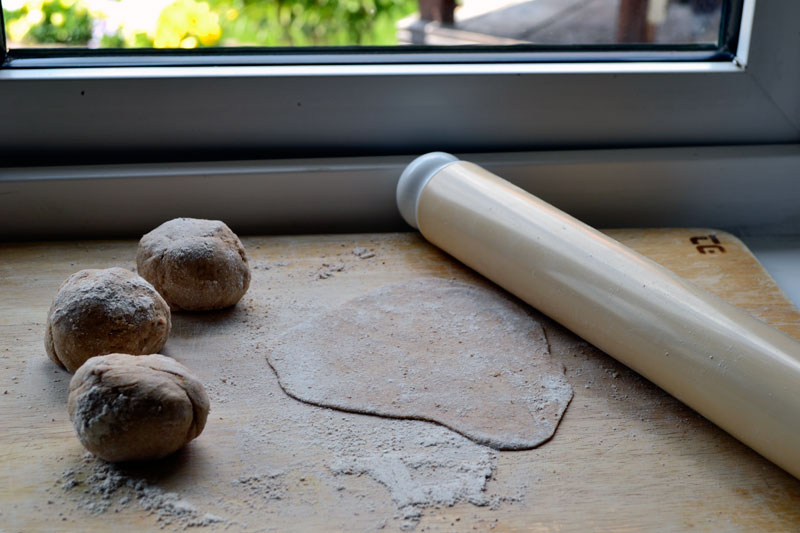
  • Whilst waiting for the water to boil, peel and either grate or finely chop the beetroot.  This bit is incredibly messy and your kitchen will probably resemble the fields of Cannae after Hannibal had his way with the Romans.
  • When the stock is simmering away, add the beetroot.  Simmer for 1.5 hours to reduce the soup.
  • When the time is up, take the chicken out and shred the meat using two forks.  Pop this back in the pan with the soup.
  • Have a taste and season accordingly.  When this is done, the soup is ready.  Ladle some into a bowl and serve with some bread.  Delicious!


Results


Beautiful, beautiful, beautiful.  With fish sauce conspicuously absent, this recipe is quite different from others we have tried before.  There is an incredible sweetness tempered slightly by the meatiness of the chicken and stock.  Mostly, it is very moreish.  Having tasted the end product it is difficult to deny how close it is to borscht (albeit very sweet borscht).  Do I think the Romans did it first?  In this case, the answer is a resounding yes!

Monday, 22 December 2014

Conditum Paradoxum - Spiced Wine


The scene above is probably frighteningly familiar to anybody who has had their Christmas work-do recently, and would probably be frighteningly familiar to many ancient Romans at this time of year.  We're currently in the midst of the Roman festival of Saturnalia, a time of gift-giving and continual partying and drinking which ran from 17th - 23rd December in honour of Saturn, the god of time.

Whilst the above fresco does not depict Saturnalia, I've included it here for two reasons - in it we see Bacchus, the god of wine, and we also see a satyr drinking his fill from a bowl.  The Romans clearly loved the stuff, so I think it is high time we had a go at Roman wine for ourselves.  And what better recipe to start with than conditum paradoxum, an ancient spiced wine not dissimilar to mulled wine.

Unlike most Roman recipes, we have exact quantities for this drink, but because this will produce an industrial sized batch, I have reduced the amounts.  As I was just testing the recipe, my quantities are enough to produce a single glass - scale the amounts if you want a bottle's worth.  A point to note is that this wine is incredibly sweet, much like a dessert wine or mead.  We know that in ancient Rome it was uncommon to drink wine straight - it tended to be diluted with water.  If you find that you need to do this, then do so!  Finally, whilst it is unlikely that this was drunk whilst warm, I think that, much like mulled wine, it is well worth doing.

Conditum Paradoxum
(makes one glass)

"Put six sextarii of honey into a bronze jar containing two sextarii of wine, so that the wine will be boiled off as you cook the honey.  Heat this over a slow fire of dry wood, stirring with a wooden rod as it boils.  If it boils over, add some cold wine. Take off the heat and allow to cool.  When it does cool, light another fire underneath it.  Do this a second and a third time and only then remove it from the brazier and skim it.  Next, add 4 ounces of pepper, 3 scruples of mastic, a dragma of bay leaf and saffron, 5 date stones and then the dates themselves.  Finally, add 18 sextarii of light wine.  Charcoal will correct any bitter taste." - Apicius, 1.1

Ingredients


  • 187ml White Wine
  • 150g Honey
  • 2 Bay Leaves
  • 1/2 tsp Fennel Seeds (instead of mastic)
  • 1 tsp Black Pepper
  • Several Strands of Saffron
  • 1 Small Handful of Raisins or Dates


Method


  • Add 75ml of wine and all of the honey to a saucepan - bring this to the boil so that the honey dissolves completely.  After several minutes, remove the pan from the heat.
  • Whilst the wine is still hot, add all of the other ingredients - this will help the flavours to infuse.  Place a lid on top of the pan to keep the heat in to prolong the process.
  • When this is cool, add the rest of the wine.  To serve, pour through a fine sieve - it will probably still be quite cloudy.  Taste for sweetness - if it is too sweet dilute with water or with more wine.  If you wish to have it hot, simply reheat in a pan!


Results


Conditum paradoxum is an incredibly sweet wine which tastes largely of pepper and saffron.  The pepper means that the mixture is warming even when served cold.  The addition of fennel seeds results in aniseed undertones, but not so much as to be overpowering.  I think that without some form of dilution, whether in wine or water, conditum becomes sickly quite quickly. Overall, this is a luxurious drink which, when served warm, is perfectly suited to the cold winter months.

Saturday, 25 October 2014

Bucellatum - Roman Army Hardtack


It's been quite some time since my last post - in that time I've travelled to Cambodia and back, started a new job and moved to a house with a very small kitchen.  In that time many of my Roman ingredients have gone off or gone missing, and I'm at a point where I have to start from the basics.  The very basics.  Where better to start, then, than with some simple soldiers' fare.

The late-Roman Codex Theodosianus, a compilation of Roman laws, states that during expeditions a Roman soldier should be supplied with "buccellatum ac panem, vinum quoque atque acetum, 
sed et laridum, carnem verbecinam." or "hardtack and bread, wine too and vinegar, but also bacon and mutton." (VII.4.6).  Soldiers were supposed to have the hardtack, mutton and vinegar for two days and then have a day of bread, wine and bacon.  We've already seen that the Romans turned vinegar into the refreshing drink posca, learned what bacon might be eaten with and discovered two different ways of baking bread.  But what of buccellatum?  What is hardtack?

Hardtack is a simple biscuit made from flour, salt and water.  As the name suggests, it is rock hard, baked twice at low temperatures for a very long time, ensuring that no moisture is left inside.  This makes bucellatum perfect for soldiering since without moisture it takes a long time to go off - ideal for prolonged campaigns in Britain where the weather would quickly spoil bread and flour.  Just as bucellatum was perfectly suited to soldiering, it was perfectly suited to soldiers too - a tooth lost to this rock hard biscuit was just another war wound.  In fact, so perfect was this match that Roman soldiers came to be known as bucellarii (Photius, Bibliotheca, 80).  The association between hardtack and the military continues long past ancient Rome, with hardtack being eaten by crusaders, Elizabethan sailors and by folks fighting in the American Civil War.

Bucellatum may have been eaten dry, soaked in posca or softened in a stew - no doubt soldiers found a variety of ways to make this staple more exciting.  Given how long it lasts, if you cook up a batch you can try new ways of preparing it for years to come.  Whilst there is no surviving recipe for Roman bucellatum, there are plenty for hardtack.  All are based upon flour, salt and water, ingredients which the Roman army had in abundance and distributed to its soldiers.  Instead of oil, which some recipes call for, I have used a small amount of butter.

Bucellatum/Hardtack
(makes 8)

Ingredients

  • 350g Flour (Wholemeal)
  • 75ml Water
  • 1 tsp Salt
  • 10g Butter/Lard or 1 tbsp Olive Oil

Method


  • Mix the flour, salt and butter.
  • Add the water, bit at a time, to create a stiff (dry) dough - hardtack is supposed to be completely dry when finished.
  • Roll the dough out until it is 1/2 inch thick.  Some sources describe bucellatum as being round, so use an upturned glass to cut out the biscuits.  You can cut it as you wish however - I can't imagine the soldiers being too fussy.  Punch holes in the dough to allow the air - and moisture - to escape whilst baking.  I used a chopstick to do this.
  • Place onto a baking tray and into an oven preheated to around 120 Celsius - you want to cook the hardtack at a low heat for a long time.  Mine took 2.5 hours.  Halfway through I turned the biscuits over and re-punched the holes.
  • Leave the hardtack to cool in the oven for several hours.  If any are still moist, cook in the oven until totally dry.


Results


I quite enjoyed bucellatum - it was tough and at times difficult to eat, but it was wonderfully salty and quite filling.  I imagine that it would work well when eaten with a stew.  With lots left over, I will see how well it keeps.


Useful links:

Wednesday, 19 February 2014

Dill Chicken


One of the most popular recipes on Pass the Garum, and indeed my personal favourite so far, is Dill Chicken. This recipe captures all of the flavours of ancient Rome and brings them together in one delicious dish.  When we first encountered it, it was as Roast Dill Chicken, but since then, I've taken to cooking it as a stew, making it taste even better than before.  So, whilst I'm wary about re-using old recipes, I think that this is one which you'll be more than happy to cook again and again.

Dill Chicken
(Serves 2)

Ingredients


  • Handful of Fresh Dill
  • Handful of Fresh Mint
  • 1/2 tsp Asafoetida
  • 1 tbsp Red Wine Vinegar
  • 2 tbsp Liquamen
  • 5 Dried Dates
  • 1 tbsp Wholegrain Mustard
  • 1 tbsp Olive Oil
  • 2 tbsp Caroenum or Balsamic Glaze
  • 2 Chicken Breasts


Method

  • Add the dates to a mortar, removing the stones if there are any. Add just enough water to cover the dates, then crush with a pestle to form a date paste.
  • Wash the dill and mint leaves.  Chop them finely, or tear apart and add to the mortar alongside the asafoetida, red wine vinegar, liquamen, mustard, and caroenum/balsamic glaze.  Crush everything until it is well mixed.
  • Dice the chicken into bite-size pieces.  You're going to cook the chicken using the hob, so heat the oil in a saucepan/frying pan/casserole/earthenware dish.  When it is hot enough, add the chicken pieces and cook for a few minutes.
  • Add the dill sauce to the pot, mix everything together, and cook on a low heat for 15-20 minutes.  If you have a lid, use it to keep moisture in.  If not, add a bit of water if it starts to look too dry.  The sauce should be quite thick, so don't add too much water.
  • Once the chicken is cooked, the Dill Chicken is ready to serve.  I recommend it with the Lentil and Root Veg Mash, or the Parsnip Mash, as these absorb the sauce well.

Saturday, 11 January 2014

Poached Eggs with Pine-Nut Sauce


Helen O'Connell once asked her good pal Dean Martin, "How do you like your eggs in the morning?"  Mr. Martin, it turns out, liked his with a kiss - the ancient Romans, on the other hand, would have been asking for a whole lot more.  This is because eggs were actually quite expensive in the ancient Mediterranean, costing one denarius per egg.  If you were buying a dozen of them, as we so often do today, you'd have to fork out 12 denarii, or perhaps 10 if you knew how to barter well.  When you consider that the average worker in 300 A.D. was making just 25 denarii per day, you come to recognise that eggs weren't an ingredient to be used with reckless abandon.

If we were a farmer with a few hens running around, we wouldn't need to worry so much, but as it stands we are mere manual labourers who have blown half of our pay packet on a dozen eggs because the fella' at the market convinced us it was a deal we couldn't afford to miss.  What we want to know is, how do we make the most of these eggs?  Why, we poach them and pour over a pine-nut sauce of course!

The recipe describes the eggs as ova hapala, which means that they ought to be very soft-boiled.  I've opted to poach them briefly to achieve this effect.  As you will also notice, I've omitted the lovage called for in the recipe.  This isn't for any culinary reasons - I simply haven't been able to find any recently!

Poached Eggs with Pine-Nut Sauce
(Serves 4)

"Serve pepper, lovage, soaked nuts, honey, vinegar, and liquamen." - Apicius, 7.17.3

Ingredients


  • 4 Eggs
  • 40g Pine-Nuts
  • 1 tsp Honey
  • 1 tbsp Red-Wine Vinegar
  • 1/2 tsp Pepper
  • 1 tbsp Liquamen


Method


  • Soak the pine-nuts in water for several hours to soften them - this will help us make the sauce later.  If you want to be that bit more decadent, soak them in white wine to add some subtle flavour to the dish.
  • Pine-nuts suitably soaked, drain them and add them to a mortar (or food processor) with the honey, red-wine vinegar, pepper and liquamen.  Crush crush crush.  You can make the 'sauce' as smooth as you like.
  • Sauce prepared, it's time to poach the eggs.  For a good no-nonsense video explaining how to do this, click here.  Otherwise:
    • Add a few inches of water to a saucepan and bring this to a gentle simmer.
    • Once the water is simmering away, add a little bit of white-vinegar - the word on science street is that this stops the egg from falling apart while it cooks.  Don't let the water boil.
    • Crack an egg into a small bowl or ramekin.
    • Stir the water in circles to create a vortex (or invoke Neptune to do it for you).  As it swirls, gently pour the egg from the bowl/ramekin into the water.  You need to be gentle to prevent it falling apart.
    • 4 minutes later and the egg is done.  Take it out of the pan with a slotted spoon and set it into your serving dish.

  • With your eggs arranged in a serving dish, spoon a little of the sauce over each of them.  Finish by sprinkling over some more pepper, then tuck in and enjoy!


Results


Perhaps it's just my predilection for poached eggs, but this dish was thoroughly enjoyable.  The earthiness of the pine-nuts combined beautifully with the poached egg, whilst the sharpness of the vinegar cut through the sauce's heavy texture.  The recipe is quite reminiscent of Eggs Benedict, albeit an Eggs Benedict with much stronger flavours.  If you want to get the most from your expensive eggs, you need look no further.

Monday, 21 October 2013

Roman (French) Toast


So much of Roman cooking involves familiarising yourself with the unfamiliar - obscure ingredients, unusual methods of preparation, and nigh-on-non-existent instructions.  So it took me by great surprise when, fumbling through the pages of Apicius, I found a very familiar recipe indeed - it would appear that the Romans had a thing for French Toast!

Needless to say the Romans were there first, so perhaps we should rename the recipe 'Roman Toast', but I can't help but imagine Vercingetorix, defeated by Caesar, being paraded through the streets of Rome with some French Toast in hand.


You may wonder what the point of posting this recipe is when I could just guide you elsewhere, but I think it's nice to see some continuity with the Roman world as well as the near-infinite differences.  You'll notice that the recipe calls for 'fine white bread' - given how time consuming and wasteful it is to produce white flour, white bread was a luxury available only to the well-off in the ancient world.  As it is written, this is a recipe of some status, but feel free to use whatever type of bread you wish, whether fresh or stale.

Roman Toast
(Makes 6 slices)

"Slice fine white bread, remove the crust, and break it into large pieces.  Soak these pieces in milk and beaten egg, fry in oil, and cover with honey before serving." - Apicius, 7.13.3

Ingredients


  • 3 Eggs
  • 200ml Milk
  • Honey
  • 6 Slices Bread

Method


  • Thinly slice the loaf of bread - it fries better this way.  Remove the crusts, and break into large chunks if you wish.
  • Break the three eggs into a casserole dish or a bowl.  Add the 200ml of milk and mix it all together.
  • Soak the bread slices/chunks in the mixture for a few seconds on each side.  If you soak them for too long, the end result will be more omelette than toast (still tasty mind you).  Drain the excess mixture off.
  • Drop the bread into a hot, oily frying pan.  Turn it over occasionally, making sure it doesn't burn.  You know it's done when it starts to look like the picture below.  When you're ready to serve, cover it in honey, as per the recipe.  Cinnamon works well too, and was available to the Romans.


Results


It tasted just as French Toast should taste!  It was crispy without being burnt, and tasted very sweet thanks to the honey added before serving.  All of the egg means that this is a filling dish - I started struggling after my third slice!

Sunday, 6 October 2013

Stale Bread Salad


With 'Best Before' and 'Use By' dates in abundance, I think we have grown scared of what we eat.  How many times have you poured away milk, or thrown out a loaf of bread because it was past the little date written on the packaging?  Or how many times have you gone rummaging to the back of the supermarket shelves to gain an extra day or two?  I know I do it all the time!  In reality, your loaf of sliced white isn't going to turn into a rock-hard ball of blue fur the moment it hits midnight, and even if it does, it still has its uses.

This week we're taking stale bread, something which I imagine was abundant in ancient Rome, and giving it a little bit of extra life.  To do so, we're going to enlist the help of our favourite Roman drink, Posca!  The recipe, if followed literally, results in an unusual looking paste.  Delicious though it is, it doesn't look very appetising, which is why I've made the salad a second way too.

You'll notice that the recipe calls for the dish to be chilled with 'snow'. Snow wasn't exactly abundant in ancient Rome, but it was possible to import some, albeit at great expense.  The use of snow in this recipe adds an opulence which we, with our humble refrigerators, cannot hope to emulate.  If winter has arrived, then feel free to use all the snow you want (as long as it isn't yellow) - the rest of us can make do without.  As a final note, I've chosen to leave out mint, as I find it very overpowering - include it according to your own tastes.

Stale Bread Salad
(Serves 1)

"Hollow an Alexandrine loaf of bread, soak the crumbs in posca, and make a paste.  In the mortar put some pepper, honey, mint, garlic, fresh coriander, salted cheese, water, and oil.  Chill in snow and serve." - Apicius, 4.1.3

Ingredients


  • Stale Bread
  • One Glass of Posca
  • One Clove of Garlic
  • 50g Hard Cheese
  • 1/2 tsp Black Peppercorns
  • Small Handful of Coriander
  • 1 tbsp Honey
  • 1 tbsp Olive Oil
  • 50ml Water

Method 1 (The Paste Method)


  • Add the pepper, cheese, coriander, and garlic to the mortar and grind it to a paste.  Add the honey, oil, and water, and mix further.  This is our dressing.
  • Hollow out a loaf of stale bread - discard the crust (or put it to use if you can think of a way!)
  • Soak the breadcrumbs in enough posca to make a paste.  Place this paste in a serving dish, and smooth it out.  Spoon over some of the dressing, refrigerate for half an hour, and serve to whoever is brave enough to eat it.

Method 2 (The Alternative)


  • Make the dressing as outlined above.
  • Remove the crusts, and cut the bread into triangles.  Arrange these in your serving dish, and pour over plenty of the posca.
  • Spoon over lots of dressing, refrigerate for half an hour, then tuck in.

Results


I'll be the first to admit that neither of these dishes look particularly appetizing.  Despite this, I still tucked into the both of them, and they were phenomenal!  Posca brought the stale bread back to life, making it deliciously juicy, sweet, and easy to eat.  The dressing was very reminiscent of moretum, one of the first recipes found on Pass the Garum - it was sweet, garlicy, and herby, with a bit of a kick from the black pepper.  As for the two methods of making the dish, I would say that the first one tastes the best.  I think we're all agreed, however, that the second is the better looking of the two.  Take your pick.

Monday, 23 September 2013

Posca


Posca, the Roman vinegar-based wonder-drink, is a bit of a mystery, because as much as people keep mentioning it, it is oddly absent from ancient literature.  Posca appears in books and articles, being sipped by soldiers and passed around by pals, yet we don't even have a recipe for it!

Basically, we know that soldiers were given a vinegar ration (Vegetius, Concerning Military Matters, 3.3), and that this vinegar could be mixed with water and drunk. (Celsus, On Medicine, 2.27)   Hadrian drank posca to 'be one of the soldiers' (Historia Augusta: Hadrian, 10.2), and from this we can infer that it wasn't a drink usually served to the rich.  On the contrary, this was a drink sold on the streets! (Suetonius, Vitellius, 12.1)  If you think about it, this makes a lot of sense - vinegar is what is left when wine production goes 'wrong', or if wine is left exposed for too long.  Knowing how much wine the Romans got through, it stands to reason that there was a lot of vinegar knocking about - so, why not put it to use?

Clearly posca was good enough to keep a Roman army marching - in his soldiering days, Cato the Elder drank posca to fend off raging thirst. (Plutarch, Cato the Elder, 1.10).  The sharpness of the vinegar masked the taste of questionable water, the acidity would have helped to kill off certain bacteria, and, according to a recent study, vinegar makes you feel more full after eating bread.  We shouldn't rush to say that the Romans knew all of this, but it is important nonetheless.  What wasn't so important to the Romans was writing the recipe down, which leaves us in a bit of a pickle.

I've encountered several recipes online, some simplistic, and others quite complex.  They're all feasible with regards to ingredients, so we're going to try them all and see how they taste.  If anybody can find a reliable source for any of these recipes, please do get in touch!  Before starting, make sure you use brewed vinegar (red-wine vinegar preferably), rather than distilled.

1) Ever-so-simple Soldier's Posca


All the sources say is that soldiers drank a mixture of vinegar and water, so that's going to be our starting point.  Nothing fancy here.


Ingredients

  • 2 tbsp Red Wine Vinegar
  • 250ml Water

Methods

  • Mix and drink!

Notes

  • If you want to replicate that 'stuck-in-the-freezing-cold-north-of-England' feeling, or fancy something a bit more refreshing, use chilled water.


2)  Sharp-but-sweet Posca


I've seen several websites suggesting that honey was added to posca (without providing sources mind you).  It's a feasible suggestion, so let's pretend we're an entrepreneuring posca salesman looking to one-up the competition, and give it a go.


Ingredients

  • 2 tbsp Red Wine Vinegar
  • 250ml Water
  • 1 tbsp Honey

Methods

  • If using set honey, melt it in the microwave for 20 seconds first.
  • Add the honey to the water, give it a stir, then add the vinegar.


3)  Posh Posca


Everybody loved the honey idea, so now they're all doing it.  We have to go one further and make our posca even tastier!  I've seen claims, again unsourced, that crushed coriander seed was a favourite addition to posca.  It's certainly feasible, although I can't imagine it's what the soldiers and common people got to drink, hence why we're calling it posh posca.


Ingredients

  • 2 tbsp Red Wine Vinegar
  • 250ml Water
  • 1 tbsp Honey
  • 1/2 tsp Coriander Seed

Methods

  • If using set honey, melt it in the microwave for 20 seconds first.
  • Add the honey to the water, give it a stir, then add the vinegar.
  • Crush coriander seeds, add them to the drink, and stir it about for a bit.  After a few minutes, strain the seeds out, and serve the drink.

Results


Vinegar and water sounds quite horrific if we're being honest, but my oh my is it good!  First up was Soldier's Posca, undoubtedly the most 'realistic' version of the drink.  No matter what you add to it, posca is always going to smell strongly of vinegar - this makes taking that first sip difficult.  Struggle through the smell and you have a very refreshing drink with a bit of a tangy taste.  The closest comparison I can think of is lemon water, or lime cordial.  Secondly was posca with a touch of honey.  This was, in my opinion, the tastiest version of the drink; the sweetness of the honey and the acidity of the vinegar work well together, making the mixture much more drinkable.  Finally there was 'Posh Posca' with its added coriander seeds.  This tasted much the same as the second drink, with the coriander seed emphasising the citrusy taste.  With the added expense and hassle however, you have to ask if it's worth it.

Without a written recipe, we can never truly know what went into posca, meaning that all of the above is just guess work.  Given what we do know, I think it's safe to say that posca resembled at least the first of these recipes, although all are equally plausible.  All I can do now is urge you to try them, and see what you think.

Monday, 10 June 2013

Lentil and Root Veg Mash with Spelt Lagana (Part 2 of 2)


Roman food, as the picture suggests, was a bit hands on - our favourite soldiers and senators didn't use cutlery very much, preferring instead to tuck in with their fingers and toes (ok, not toes) instead.  That makes eating Lentil and Root Veg Mash a bit tricky, which is why we shall serve it with some lagana - a type of Roman flatbread.

Flatbread is great stuff - all you need is flour, water, and a hot surface.  With no need for yeast or fancy ovens, this is the kind of bread which anybody, rich or poor, could eat.  I'm making mine with Spelt flour, a type of flour used in Roman Britain.  I know Spelt can be quite tricky to find though, so feel free to use whatever flour you can find.

Laganum
(Makes 4)

Ingredients


  • 100g Spelt Flour (+ extra for dusting)
  • Water

Methods


  • Prepare a work surface by sprinkling over some flour.
  • Sieve 100g of flour into a bowl, and add just enough water to form a dough.  Knead this by hand, adding more flour as necessary, until it is neither too wet nor dry.
  • Divide the ball of dough into four equal pieces.  Roll these one at a time until they are flat, disc-shaped, and uniformly thin.
  • Add a drop of oil to a frying pan, and when it is hot enough, set a laganum in.  As it cooks, it will start to puff-up in places as pockets of air are formed.  When dark spots start to form on the underside, flip it over.  Each side should take about a minute to cook.  If needs be, press down on the top side to speed things up.

Results


Despite being just flour and water, these lagana are great eaten straight out of the pan; the nutty flavour of spelt works wonderfully in this instance (in fact, it left my kitchen smelling vaguely of popcorn!)  When eating with the mash, just rip a bit of bread off and use it to pick up some of the lentil & root veg goodness - it tastes good, and keeps your fingers nice and clean!


Lentil and Root Veg Mash with Spelt Lagana (Part 1 of 2)


The sun has now been shining for the fifth day in row (a rarity here in Northern Ireland!), and feeling inspired by all the bright colours, I thought we'd give this lentil and root vegetable mash a try.  As you can see, it looks lovely and bright and cheery, but does it taste that way too?

In this first post we'll make the mash itself, and in the next we'll cook up some simple spelt-flour flatbread to eat it with.  The original recipe only calls for parsnip (and we know how good they taste!), but I see this as a perfect opportunity to cook some carrots too.  (Fun fact: Carrots were purple in antiquity!)  To make this recipe more accessible, we'll be leaving out 'fleabane', a daisy-like plant which is no longer used in cooking.

Lentil and Root Veg Mash
(Serves 2)

"Boil the lentils in a clean pan with some salt.  In the mortar, crush some pepper, cumin, coriander seed, rue, and fleabane.  Add vinegar, honey, liquamen, & defrutum.  Mix this with the lentils.  Cook and mash parsnips, and add to the lentils.  When it is cooked, add some extra virgin olive oil and serve appropriately." - Apicius, 5.2.1

Ingredients


  • 1 Parsnip
  • 1 Carrot
  • 100g Split Red Lentils
  • 1 tsp Coriander Seeds
  • 1 tsp Rue
  • 1/2 tsp Cumin Seeds
  • 1/2 tsp Black Pepper
  • 1 tsp Liquamen
  • 1 tbsp White Wine Vinegar
  • 1.5 tbsp Honey
  • 3 tbsp Caroenum
  • 1 tbsp Extra Virgin Olive Oil


Methods


  • Add the lentils to a saucepan and pour in enough water to cover them.  Throw in a pinch of salt, and bring to the boil.  This will take approximately 20-30 minutes, and will require you to add more water every once in a while.
  • Peel and chop up the carrot and parsnip, set them into a saucepan full of water, and bring to the boil.
  • Whilst everything is boiling away, toast the various herbs and spices in a dry frying pan for around a minute, being careful not to burn them.  Grind them all up together in a mortar and pestle.
  • Once the lentils have turned to mush and the liquid has largely boiled away, add the spice mix and pour in the various liquids (except the oil).  Stir it all together and let it simmer while you sort out the root vegetables.
  • When the parsnips and carrots are cooked, drain the water from the pan and mash them up.
  • Mix the lentils and root vegetables together with the tbsp of olive oil.  Heat in the pan for a little while longer until the liquids have mostly evaporated.  Serve and enjoy!

Results


This mash makes for a remarkably filling meal - I had intended this recipe to serve just one, but it quickly became apparent that I would need help to finish it!  Besides being filling, the dish was delicious.  The lentils added a subtle, salty flavour to the meal, providing a wonderful backdrop to the sweetness of the parsnips and carrots.  The sweetness of the root vegetables was further emphasised by the caroenum and honey, and the saltiness of the lentils by our friend the fish sauce.  The dish was afforded some warmth by the cumin and coriander seeds, but rather amazingly, the stand out flavour and aroma came from the rue, despite so little being used.  Final verdict?  Filling and flavoursome - always a good combination.

Monday, 3 June 2013

Parsnip Mash and Salt Pork


There is little which compares to the smell and taste of honey-roast parsnips lifted straight out of the oven; here is a food which gets me giddy with excitement!  Not necessarily so for those ancient Romans and Greeks.  Pliny's advice is to boil the life out of them so that you might rid them of their pungent flavour.  Aretaeus, the ancient Greek physician, describes them as "bad, even when boiled... (The parsnip is) flatulent and swells in the stomach."  On the plus side however, Pliny reckons that if you simply carry one with you, you'll never be stung by serpents, and it does offer at least some excitement; it is a well known fact, apparently, that it is a powerful aphrodisiac!

We're lucky that somebody decided parsnip was worth a go - the Apicius volume contains quite a lot of parsnip recipes.  Let's see how they taste.

Parsnip Mash with Salt Pork
(Serves 1 - multiply quantities accordingly for more)

"Mash the parsnips, then add cumin, rue, liquamen, passum, oil, coriander leaves, and leeks.  Serve.  Goes well with salt pork." - Apicius, 3.20.4

Ingredients


  • 2 Slices Of Bacon or Salt Pork
  • 1 Parsnip
  • 1 Inch Of Leek
  • 1 tsp Coriander
  • 1/4 tsp Cumin Seeds
  • 1/2 tsp Rue
  • 1 tbsp Liquamen
  • 1 tbsp Olive Oil
  • 1/2 tbsp Passum

Methods

  • Chop the parsnip up into chunks - this makes for easier boiling and mashing.  Add them to a pan of boiling water for 15-20 minutes, or until done.
  • Meanwhile, toast the cumin seeds and grind with the rue, coriander, and leek.  Mix this with the liquamen, passum, and olive oil.
  • If using bacon, grill or fry it.  If you are using salt pork, boil it in water for a few minutes before frying it, or else it will be unbearably salty.
  • When the parsnip is boiled, drain away the water and mash it up.  Add all of the herbs, spices, and liquids.  Mix this together so that it is well blended.  Serve with the pork and enjoy.


Results


Bacon and parsnip make for good bed-fellows - the sweetness of the parsnip compliments (and counteracts) the saltiness of the meat, making this an ideal pairing, even without the addition of the various herbs and spices.  In fact, when I first tried this dish I was convinced I couldn't even taste the added ingredients - it tasted just like parsnip!  I tried cooking it again, this time adding more of each herb and spice, but the result was the same - all I could taste was parsnip.  It was only when I ate mashed parsnip, without any additions, did I realise the effect these extra ingredients were having; they don't change the flavour of the vegetable, but rather they enhance it, emphasising its sweetness.  This is a simple meal, but an enjoyable one which I heartily recommend.

I also wish to point out (and I cannot do this enough) that this parsnip mash is, without a doubt, the perfect accompaniment to the remarkably popular dill chicken recipe.

Tuesday, 21 May 2013

Honey and Poppyseed "Dormice"


Several weeks ago Caroline Lawrence very kindly sent me a copy of The Secrets of Vesuvius, book 2 of 17 in her 'Roman Mysteries' series.  The Roman Mysteries are works of historical fiction aimed at kids, introducing them to the people and places of the ancient world - they're the kind of books I wish I had growing up!  In my eyes, anything which makes history more accessible to children is great, so this week I'm going to take inspiration from Caroline and create a kid-friendly dish.  These "dormice" are easy to make, very tasty, and most importantly, they're fun.

My inspiration comes from a passage in Caroline's first book, The Thieves of Ostia (used with the permission of the author of course):

'For our next course we're having dormice stuffed with chopped sows' udders,' she announced brightly.
Mordecai and his children froze in horror.
Nubia looked blank.
'Flavia...' said her father with a warning look.
'Just joking,' giggled Flavia. 'My favourite food is really roast chicken.  You do like roast chicken, don't you?'

I love this scene - there's something truly Trimalchian about playing tricks with food!  Of course, like Flavia, we're not really going to be serving up dormice - they're not exactly easy to come by in the shops!

Honey and Poppyseed Dormice

"The dishes for the first course included... some small iron frames shaped like bridges supporting dormice sprinkled with honey and poppy seed." - Petronius, Trimalchio's Feast

Ingredients


  • Chicken Thighs & Drumsticks
  • Extra Virgin Olive Oil
  • Honey
  • Poppy Seeds
  • Salt
  • Pepper

Methods

  • Rinse the chicken and cut off all the nasty bits.  Leave the skin on if you want the 'mice' to be nice and crispy!  Once rinsed, pat the chicken dry.
  • Set the chicken onto an oiled/greased baking tray, making sure to rub some of the oil into the skin. Season with salt and pepper and place into the oven, uncovered, for 30 minutes at 180 Celsius.
  • Just before the chicken is due to come out of the oven, gently heat some honey in a pan, and sprinkle some poppy seeds out onto a plate.
  • Whenever it looks ready, roll the cooked chicken around in the honey and then the poppy seeds.  When all is done, pour the remaining honey and poppy seeds over the top of the chicken.
  • To make our thighs and drumsticks look more 'mousey' we're going to add some tails - stick a cocktail stick into each bit of chicken, as shown below.  Having the mouse on a stick also makes it much more easy to eat!  The drumsticks are already rather mouse-shaped, so you can leave them be.


Notes

  • Ingredient quantities depend entirely on how many mice you mean to make!


Results


Our 'dormice' are sweet and crispy, with a slight crunch coming from the poppy seeds.  In short, they're delicious, and I dare say Flavia would be pleased.  Much more than that, they're seriously simple to make, allowing you to add a taste of ancient Rome to your dinner/party/classroom without the hassle of chopping herbs and grinding spices.

Sunday, 12 May 2013

Asparagus Patina


Future historians will no doubt be equal parts amused and confused by the Asparagus Festival, an eight week celebration of the British asparagus season which sees people wear all manner of silly costumes and paint themselves several shades of green.  To celebrate this season I think it's only appropriate to cook up a Roman Asparagus Patina, given that it was the Romans who brought this most delicious of plants to Britain in the first place!

The 'Patina' is rather difficult to explain; all Patinas are egg-based, however some resemble oven-baked custards, whilst others are closer to frittatas and omelettes.  Regardless of how they turn out, they make for very tasty eating all the same.  So, whilst asparagus is at its finest, I urge you to go out, buy some, and get baking.

Asparagus Patina
(Serves 4)

"Make Asparagus Patina as follows: put asparagus tips into a mortar and add pepper, lovage, green coriander, savory and onions.  Dilute this with wine, liquamen, and olive oil.  Add this mixture to a well greased pan, adding some beaten eggs to thicken it if you like.  Cook without boiling the eggs and serve with finely ground pepper." - Apicius, 4.2.6

Ingredients


  • 10-15 Asparagus Spears
  • 180 ml White Wine
  • 25 ml Fish Sauce (Liquamen)
  • 25 ml Raisin Wine (Passum)
  • 40 ml Extra Virgin Olive Oil
  • 1/2 tsp Black Pepper
  • 1/2 tsp Lovage Seeds
  • 1/2 Small Onion
  • 2 tbsp Fresh Coriander

Methods


  • Using just the tips of the asparagus seems rather wasteful, so we're going to prepare the whole lot.  Set 4 spears to the side for garnishing the dish at the end, and steam what is left for just a few minutes until tender.  Make sure to chop off the woody ends.
  • Grind up the peppercorns and lovage and chop up the onions and coriander. Add these, alongside all of the liquids (leaving a bit of oil for later), to a food processor.  The following magical transformation should occur.

  • Pour this mixture into an oiled baking dish of some sort.  I am using the base of my tajine, but any oven proof dish should do the trick.  After spreading the mixture out, crack two eggs onto the top and beat them in thoroughly.
  • This will take approximately 25 minutes in an oven set to 180 Celsius.
  • The dish is cooked when it is omelette-like in consistency.  Use the asparagus spears you left over at the beginning to garnish the dish.  Sprinkle with a touch of pepper and serve straight away.  One similar recipe in Apicius (an Asparagus Patina with the addition of cooked bird embryos - no thanks!) suggests that it can be eaten cold, so refrigerate any leftovers and give that a go if you think you might enjoy it.

Notes

  • Rather unusually, this Asparagus Patina recipe seems to suggest that the eggs are optional.  The asparagus patina listed just prior to this one in Apicius (the one with the bird embryos) doesn't!  My explanation is that if you cooked the Asparagus mush without adding the eggs, you'd end up with an omelette-like consistency anyway.


Results


The patina was light, fluffy, and full of subtle flavours.  The initial taste is of the fragrant coriander, followed by the bitter, celery-like taste of the lovage seeds.  As you might expect, we finish on delicious, delicious asparagus.  This is a great and unusual way to cook the plant, and one which would work well as a starter to meals both ancient and modern.  Although you would lose some of the subtle flavours, you could very easily leave out the fish sauce, lovage seeds and raisin wine if needs be.  Enjoy it whilst asparagus is at its finest!

Monday, 6 May 2013

Roman Seafood Sauce


The Greek manner of preparing fish is, as we have learnt, simple yet successful - cook it as you catch it, and if you absolutely have to touch it, stick to a sprinkle of cheese or a pinch of cumin.  Now, it's back to the beautiful complexity of Roman recipes, with lists of ingredients as long as your sword and a journey of flavours as epic as the Illiad.

At first glance, Apicius offers a vast array of seafood sauces, but a closer look reveals that they are all virtually identical!  Common to almost all of them are pepper, mint, lovage, rue, dates, honey, oil, and vinegar.  The Romans clearly liked their fish to be swimming with sweetness.  Let's see how well that works.


Roman Seafood Sauce
(Serves 2 as main, or several as a starter)

"Pepper, Lovage, Celery Seed, Mint, Rue, Figdate or Date Syrup, Honey, Vinegar, Wine.  Also suitable for sardines." - Apicius, ix.10.5

Ingredients


This is without the mint, and plus soap
(which you probably shouldn't use)

  • 2 Mackerel Fillets
  • Small Handful Fresh Mint
  • 1/2 tsp Lovage Seeds (or Celery Seed)
  • 1/2 tsp Black Pepper
  • 1 tsp Rue
  • 1 tbsp Date Paste
  • 1 tbsp Honey
  • 2 tbsp White Wine Vinegar
  • 2 tbsp Extra Virgin Olive Oil
  • 50 ml White Wine

Methods

  • Add the rue, lovage and pepper to a dry frying pan and heat them until they start to give off an aroma.  At this point, remove them and grind them up.
  • Combine all the liquids, herbs and spices in a food processor and let loose.  If you wish to use a mortar and pestle, make sure to chop the mint up first.
  • This is what you're going to marinate the fish in for a few hours, so once you have prepared the fish fillets, combine everything together in a shallow casserole dish.  This goes into the fridge for a couple of hours.
  • I cooked the fish, sauce and all, in an earthenware dish on a gas hob for around 25 minutes.  If you want, you can place the whole lot in an oven at 180 Celsius for 20 minutes to achieve the same effect.  Grainger suggests removing the fish from the marinade, cooking it on a griddle, then heating and pouring over some of the sauce.

Notes

  • The recipe isn't much of a recipe, but rather a list of ingredients.
  • I chose not to use both celery seed and lovage, because their flavours are remarkably similar.  Instead, I chose to use more of just one, rather than a little of each.
  • As ever, I advise you to use caution with the rue - if in doubt, leave it out!


Results


I couldn't wait to try this, so dropped the knife and fork and tucked straight in with hands and fingers.  It was beautiful, sharing that same 'tangy-sweetness' common to so much Roman cooking.  The fish was delicate and soft and had soaked up a lot of sweetness from the honey and date paste.  The initial taste came from the sharpness of the vinegar and wine, but was soon tempered by the fragrance of the mint.  This fish was surprisingly rich in comparison to the cheesy-fish of the Greeks, which is why I reckon it would do two people as a main - I would be inclined to serve it as a starter for several people instead.  Overall, I think that my favourite ancient fish recipe is last week's ancient Greek Mackerel with Cumin, Cheese, and Oil, but it's up to you to decide which you prefer.