Tuesday, 13 November 2012

Dulciaria (Pepper and Pine-Nut Stuffed Honey Dates)


Thus far we've been dining on hearty stews and heavy breads, which, whilst all very filling and tasty, have done little to cater for those with a sweet tooth.  "Where are all the desserts?" I hear you ask.  "Didn't the Romans enjoy brownies and trifle and Victoria sponge?  What about panna cotta, pavlova, and tiramisu?"  I am afraid I must be the bearer of bad news, because Apicius is largely silent on all things dessert.  This is not entirely surprising when we consider that the Romans had no sugar, no chocolate, and flour better suited to throwing in the bin than into a cake mix.  What they did have, however, they made excellent use of.

Whilst Apicius is largely silent on tasty little treats, it is not without.  One recipe which we do have is the recipe for dulciaria, coming from the Latin dulcis, meaning sweet.  These sweets are made as follows:

To make little home-made sweets, remove the seeds from dates and stuff them with nuts and ground pepper.  Sprinkle salt on the outside, candy them in honey, and serve. - Apicius, 7.13.1

These are all ingredients we've seen before in our Roman cooking - we've used nuts, pepper, honey, and salt extensively.  Now it is time to combine them all in a most delicious way.  I am going to experiment and use dried figs too, just to see how it turns out.  I am leaving out measurements for this recipe because it all depends on how many dulciaria you want to make - use as much as of each ingredient as you think you'll need!

Dulciaria - Little Sweets

Ingredients


  • Dried Dates and Figs
  • Pine Nuts
  • Black Peppercorns
  • Set Honey
  • Salt

Methods


  • Remove the stones from the dates, and cut a pocket in the figs.
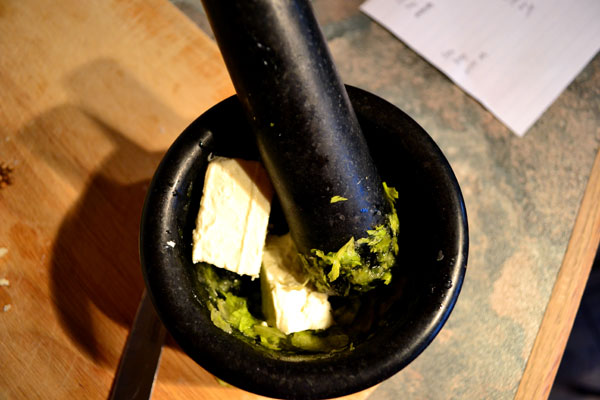
  • Crush some peppercorns in a mortar and pestle and mix with the pine nuts.
  • Stuff the dates and figs with this peppery pine nut mixture.
  • Sprinkle the tiniest bit of salt over the stuffed fruit, rubbing it in a little bit to ensure that it sticks.

  • Cover a plate/baking tray with some non-stick greaseproof paper.
  • Put a few spoonfuls of honey into a saucepan (I used 2 tbsp) and bring to a simmer.  The honey will start foaming up after a little while.  When it does this, take the pan off the heat.
  • Stick a cocktail stick/skewer through the first bit of fruit and dip it into the practically molten honey.  It helps to tilt the pan so that it all gathers on one side.  Roll the fruit around a bit to make sure it is covered, before setting it onto the greaseproof paper.  Use a fork to prize the fruit off the cocktail stick/skewer, and repeat.
  • When all are done, pour any leftover honey over all of the dulciaria and leave to 'set'.

Notes


  • Removing the stones from dates can be tricky - I found it best to chop a bit off one end (the end which the stone is attached to - you'll soon work it out) and squeeze the stone out.
  • The honey will be HOT.  Do not put your fingers or toes anywhere near it, and certainly do not try to taste it.
  • The honey doesn't 'set' as well as the candy on a candied apple might.  I found it helpful to put the tray in the fridge (once the honey had cooled a bit).


Results


These were quick and easy to make, and a pleasure to eat.  It goes without saying that they are sweet, but the salt on the outside gives them a depth of flavour which means that they taste of more than just honey.  Biting into them, you get the crunch of the pine nuts, followed a second later by the spicy-sweetness of black pepper.  The warmth of the pepper lingers, leaving you with fond memories of what went before.  These sweets remind me of the taste of Christmas (rather anachronistic I know).  The figs and dates both worked equally well, with the figs being juicier and the dates crunchier.  I look forward to seeing your attempts!

Monday, 5 November 2012

Alexandrine Gourd


This Alexandrine Gourd recipe is one which keeps catching my eye - it sounds both delicious, and exotic.  Situated in Egypt, some 1200 miles from the city of Rome, Alexandria and its food had the same charm for the Romans as Asian food does for us.  That alone makes this a dish I want to try.

There is, however, one big problem.  The majority of gourds, squashes, and pumpkins are native to the Americas and were thus unknown to the Romans.  Wanting to stay true to the original recipe, I set off on the hunt for the vegetable they might have used.  I asked gardeners, asked farmers, and asked botanists, and the only thing that we could come up with was the Bottle Gourd, which I quickly set off to buy.  I soon learned, however, that semi-rural Northern Ireland is not the ancient Mediterranean, and alas, I came back empty handed.  My solution?  I cheated.

To all who came here wanting nothing but authenticity, I apologise.  We've had a good run, but I'm afraid now is the time to unsubscribe.  To everybody else, I say the following:

  • The draw of this dish is not the 'gourd', but the 'Alexandrine'.  Most gourds are pretty tasteless, meaning that it is the seasoning and cooking methods which matter most - those we can stay true to.  We can recreate that Alexandrine feel.
  • If I struggled to find an authentic gourd, I imagine that most of you will too.  The point of this blog is to make Roman cuisine accessible, and to inspire others to try it out.  That's not possible if we stick to obscure ingredients which few can find.
  • The dish sounds damned tasty and I want to try it.

In the end I came back from my shopping trip with both a pumpkin, and with what I think is an acorn squash.  I didn't use the pumpkin in this recipe, but given that they are cheap and plentiful right now, anybody wanting to make this dish could use one.  The presumed acorn squash, which I did use, is completely tasteless, meaning that I'll be experiencing the full effect of the 'Alexandrine' cooking method. So, without further ado, the original recipe:

Boil some gourd, squeeze the water out of it, and place in a baking dish.  Sprinkle with salt, and ground pepper, cumin seeds, coriander seeds, mint, and asafoetida; season with vinegar. Now pour in the date wine, pine nuts ground with honey, more vinegar, and fish sauce.  Measure out some condensed wine and olive oil, pour these over the pumpkin, and cook it all in an oven.  Sprinkle with pepper before serving.  - Apicius, 3.4.3

Let's preheat the oven to 180° Celsius and get going:

Alexandrine Gourd

Ingredients


  • 1 Small Gourd/Squash/Pumpkin
  • A Pinch of Salt
  • 1 tsp Black Peppercorns
  • 1 tsp Cumin Seeds
  • 1 tsp Coriander Seeds
  • 1/2 tsp Asafoetida
  • A Handfull of Pine Nuts
  • A Small Bunch of Mint
  • A Splash of Red-Wine Vinegar
  • A Liberal Helping of Dessert Wine
  • A Drizzle of Olive Oil
  • 2 tbsp Runny Honey
  • 1 tbsp Fish Sauce
  • 1 tbsp Date Syrup

Methods


  • Peel the gourd/squash/pumpkin, chop it up into bitesize bits, and boil in a saucepan.  Add the pieces to an oven proof dish.
  • Toast the pepper, cumin, and coriander before grinding it up in a mortar and pestle - this smells delicious!  Sprinkle this heavenly mixture over the gourd along with a pinch of salt and the asafoetida.
  • Remove the mint leaves from their stalks, give them a wash, chop them up, and add to the dish.
  • Add a splash of red-wine vinegar.  Drizzle the runny honey backwards and forwards over the gourd a few times.  Do the same with the date syrup, the oil, and the fish sauce.  Pour a good bit of dessert wine over the whole lot, and a bit into a glass if you fancy a drink.
  • Finally, add the handful of pine nuts to the whole concoction and toss it all around.
  • Bake in the oven for 30-40 minutes, and serve immediately.

Notes


  • Apicius says to squeeze the water from the gourd - I only succeeded in scalding myself.  If you work out a good way to do this, let me know.

Results


If this is how they cooked in Alexandria then it's little wonder that the Romans wanted to eat the Alexandrine way.  If you recall, in a previous post I said that a common criticism of ancient cuisine was that it is overseasoned.  If this dish and the previous dishes I have cooked are anything to go by, then I would say that they are perfectly seasoned.  No one flavour dominates here - the dish has a lovely minty undertone, the wine, honey, and date syrup add a delicious sweetness, the fish sauce and asafoetida work the savoury taste-buds, the crunch of the pine nuts compliments the softness of the squash, and the tingle of the vinegar reminds you that this is indeed an exotic meal.  I can see why this recipe came to have a home in Roman cookbooks.

Tuesday, 30 October 2012

Pork and Fruit Minutal


We've finally hit a recipe with an ingredient list the length of our collective arms, making this the perfect opportunity to test the theory that the Romans liked to over-season everything.  We've also finally hit a recipe with that infamous fish-sauce garum, or more accurately liquamen - there are differences between the two which I'll go into in a later post.

I was browsing through Sally Grainger's Cooking Apicius, as I am wont to do these days, and spotted her Pork and Apricot Minutal.  This sounded so delicious that I immediately went in search of the original recipe, which is as follows:

Put some oil, wine, liquamen (fish sauce), diced cooked pork shoulder, and finely chopped onions in a saucepan.  When the onions are done, grind some pepper, cumin, mint, and dill, and add to the pan with honey, passum (raisin wine), a splash of vinegar, the juices from the cooked meat, and more liquamen.  Remove the seeds from some fruit and add this fruit to the pan.  Bring the mixture to the boil, and when cooked, skim the fat from the top, bind everything together, sprinkle with pepper, and serve.  - Apicius, 3.6

This differs somewhat from Grainger's take on the minutal.  I have decided to stick to the original recipe's ingredients and methods whilst using Grainger's ever-useful measurements.  I have also, as you can see from the last post, used tracta from Cooking Apicius as the thickening agent for this dish.  Without further ado, let's start this hearty stew.

Pork and Fruit Minutal


Ingredients


  • 500g Pork Belly
  • 1 Medium Onion
  • Several Scallions/Spring Onions
  • 300ml Water
  • 375ml White Wine
  • 2 tbsp Fish Sauce (nam pla)
  • 50ml Extra Virgin Olive Oil
  • 1 tsp Cumin Seeds
  • 1/2 tsp Black Peppercorns
  • A Few Sprigs of Fresh Mint
  • A Few Sprigs of Fresh Dill
  • 1 tbsp Set Honey
  • 2 tbsp Red Wine Vinegar
  • 1.5 tbsp Raisin Wine
  • A Handful of Dried Figs and Apricots.
  • 3 Tracta Discs

Method

  • Preheat the oven to 180°C.
  • Rub the pork belly with olive oil (not from the 50ml of olive oil) and salt, and cook in the oven for approximately half an hour or until done.  When finished, leave to cool.
  • Add the water, wine, fish sauce, and olive oil to a saucepan, then bring to the boil.  I advise giving it a taste, just because it's so deliciously unusual.  When it is boiling, add the onions and the pork, and reduce to a simmer.

  • Whilst the onions are cooking, toast and grind the cumin seed and the black peppercorns.  You know that they're toasting once the cumin starts giving off its distinctive smell.  Don't overdo it!  Chop the mint and the dill up together also.
  • Add the above to the pan alongside the honey, vinegar, raisin wine, and a splash of fish sauce.  Give it a stir, bring to the boil briefly, and let it simmer once more.
  • Add in the roughly chopped dried apricots and figs.
  • Take three of the tracta sheets you fought so hard to make, and watch that hard work turn to nothing as you break the tracta up into fine pieces.

  • Add the tracta to the pan whilst stirring.  Stir for maybe 5 minutes and watch the minutal thicken.  Taste for flavour, season if necessary, and serve with a loaf of freshly baked bread.

Notes

  • My liquamen was simply a shop bought nam pla or fish sauce.  You'll find it alongside the Asian food.  If yours is too dark or too salty then you can adjust the salt levels by mixing it with white grape juice reduced to half of its original volume.
  • The passum was a nightmare to find.  Grainger likens it to a modern raisin wine, but says that a dessert wine such as a Muscat, which I have used, will work too.
  • Tracta are a nightmare to make - if you can't be bothered, add some cornflour instead.

Results


There are not enough adjectives in the English language to describe the beauty of this minutal.  The acid from the vinegar and the sweetness from the different wines made it almost tingle in  the mouth.  The delicate flavours of the dill were surprisingly distinctive, and the mint provided a subtle background to the meaty, savoury aspects of the dish.  Because the figs and apricots were only briefly stewed they retained a lot of their fruity flavour, and it was nice to alternate between bites of pork and bites of fruit.  The texture was, thanks to the onions and tracta, quite creamy, which meant that it clung well to the bread I ate the dish with.

To those who say that the Romans overseasoned everything I say try this dish - I have never before seen ingredients compliment each other so well as they do in this recipe.  The flavours are at once homely and exotic, leading to a profoundly satisfying meal which I will serve for years to come.

Monday, 29 October 2012

Tracta


"Is this it?" - that's what you'll all be thinking right now.  "We've gone from lovely, fruity, succulent ham to thin sheets of dried dough."  But before you delete Pass the Garum from your bookmarks and unlike the Facebook page, I want you to hear me out.  These sheets of dried dough, or tracta as our friend Cato calls them, are vital to several recipes:

  • Tracta were used in the off-puttingly named placenta, which you'll be glad to hear has nothing to do with the modern meaning of the word.  Placenta was constructed out of layers of a honey-cheese mixture separated by layers of tracta - it helps to imagine the way in which a lasagne is constructed (but there the resemblance to lasagne must end).  This was then used in religious ceremonies, which we'll learn more about more when we actually make placenta.
  • The other use for tracta was in thickening stews, making them that little bit heartier and more filling.  This is what we'll be using ours for initially, so let's make some.  

The Roman recipe for tracta is as follows:

Soak some groats in water, and after they have sat a while and softened, drain them and put them into a bowl.  After kneading them for some time, gradually add some flour and make a dough.  Make the tracta from this dough, spread them out, and let them dry. - Cato, On Agriculture, 76

It was a recipe in Grainger's Cooking Apicius which required me to make tracta in the first place, so it was to this book that I turned for an interpretation of Cato's recipe.  I didn't use the quantities recommended by Grainger, but her methods, honed by years of experience, worked perfectly.  Before we start, I must warn that this process is equal parts labour intensive and frustrating.  With that in mind, let's begin.


Tracta

Ingredients


  • 200g of Semolina (the 'groats' in the recipe)
  • 200g of Spelt Flour
  • 150ml of Water

Methods

  • Cover the semolina in water (not from the 150ml) and leave to soak for 20 minutes.  When done, drain away as much excess liquid as you can using a sieve (or a fine cloth if you have it).
  • Add the 'groats' to a clean bowl and gradually mix in the flour.
  • Add as much water as is necessary to form a smooth and workable dough.  Our biggest enemy in this recipe is sticky dough.
  • Take half of the dough, roll it into a sausage, and divide it into 8 pieces.  Do the same with the other bit of dough.  Roll these little pieces into balls, cover with flour, and place back in the bowl.  Cover with a damp cloth to prevent them drying out.
  • Flour a LARGE work surface, a rolling pin, and several baking trays and chopping boards.
  • Grab one ball and place it onto the floured work-surface.  Squash it flat with the palm of your hand, then, keeping everything well floured, roll it as flat as it will go without it sticking to the work surface or the rolling pin.  Unfortunately, it will stick to the surface, but persevere.  It also doesn't matter how irregular it looks, as my attempt demonstrates.  Using a fish slice or something similar, gently lift it up and set it onto one of the floured trays.
  • Repeat this for all of the little dough balls and set aside to dry, which can take hours.  I had just finished baking a new loaf of Cato's bread, so I set the tracta into the cooling oven for maybe ten minutes at a time.  It is important that the oven is not switched on as we want to dry these, not cook them.

Notes

  • Spelt flour is expensive, so for the dusting I used normal, cheap, plain white flour.
  • The semolina in the dough makes it very squishy and fun to play with.


Results


Yum.  These looked so appetising that I ate them all in one go.

Thursday, 25 October 2012

Baked Honey Ham in Pastry with a Fig Sauce


Today is one of those lucky days when meat is on the menu - perhaps we got lucky at the gladiatorial games and won a few coins, or maybe our patron was feeling very generous with his gifts, or it might just be that we walked out of the front door of the farm and saw Porky the Pig standing there looking awfully delicious.  Poor Porky - now you're chopped up and waiting to be cooked.

Today's recipe comes from Apicius, 7.9.1, or recipe number 287 if you want to go by that instead.  I was inspired by Grainger's take on this (Grainger, S., Cooking Apicius, (Totnes, 2006) pp.62-63), and found some of her methods very useful, but I've changed a few of the ingredients.  The recipe in Apicius reads roughly as follows:

Braise the ham with a generous helping of figs and three laurel leaves.  Peel off the skin, chop it into squares, and cover it all with lots of honey.  After, make a dough with flour and oil and wrap the ham up inside.  Bake slowly and serve as soon as it's ready. - Apicius, 7.9.1

There are the usual issues with 'what type of ham should we use?', 'how many figs are needed?', and 'how much dough do we make?', but I'm starting to like the Romans' way of going by feel and using my instincts.  I found that the following worked well:


Baked Honey Ham in Pastry with a Fig Sauce

Ingredients


The Meat
  • 750g Lump of Unsmoked Gammon
  • 8 Dried Figs
  • 3 Bay Leaves
  • 125g Set Honey
The Pastry
  • 250g Spelt Flour
  • 100ml Water
  • A Pinch of Salt
  • A Splash of Extra Virgin Olive Oil

Method

  • Briefly sear the meat in a hot frying pan before adding to a saucepan.  Add cold water, the three bay leaves, and all of the figs.  Bring to the boil, then reduce to a simmer. This meat needs 20 minutes, with an extra 20 minutes per 500g.  However, I gave mine just 40 minutes in total and it came out perfect.  Remove from the meat from the sauce and leave it to cool.
  • Whilst this is happening we need to make the pastry dough.  Prepare a work surface (I used the kitchen bench) by giving it a clean and sprinkling it with flour.  Take out a rolling pin and dust it with flour too.
  • Mix the flour, salt, oil, and water and knead it until smooth.  Take half of the dough and keep it covered with a moist towel to stop it from drying out.  Place the other half onto the work surface and get ready to roll.
  • This dough has to be VERY thin.  The best way to do this is to roll it at the edges with a rapid backwards and forwards movement.  Once you have a roughly rectangular batch of dough, place it on a floured surface and repeat with the second batch.
  • By this stage the meat should be quite cool - this is important because we're adding honey to it, and it will melt otherwise.  Remove the skin and chop it into little pieces.  Score the meat with a knife on all sides, creating grooves for the honey to seep into.  Now, grab a handful of honey and rub it all over the meat.
  • With the meat honeyed up, lay one sheet of dough out on a baking tray and brush the top side with olive oil.  Place the meat at one end and roll it all up!

  • Brush the outside with olive oil now and wrap the whole bundle with the second bit of dough.  Oil the outside of this so that it goes nice and crispy in the oven.  Place back on the oiled baking tray and into an oven preheated at 180°C.  Cook for 1 hour, adjusting the heat if necessary.
  • For the final 15 minutes, strain the concoction you cooked the ham in through a sieve and add half of it to a pan to reduce.  Using a pan with more surface area means it will reduce more quickly.
  • Remove the ham from the oven, let it sit for 5 minutes, then chop it up and put it onto a plate.  Pour some of the fig sauce over.  Delicious.

Results


What a dish!  I served this with some cabbage boiled very briefly in the remaining fig/bay/ham cooking liquid, and it went down a treat.  The outside layer of pastry was crisp, the inside layer was soaked in honey and ham juices, and the ham itself was very succulent.  The diners, who had no idea as to what I was making, picked up on the honey and fig flavours.  What struck me most about this dish was how 'normal' it felt - this could easily have been featured in a Jamie Oliver cookbook, or served up in a local restaurant.  The Romans, with this recipe, have created a truly timeless dish.

Friday, 19 October 2012

Cooking Apicius

Review of Sally Grainger's Cooking Apicius, (Totnes, 2006) - This can be bought on Amazon.

Perhaps the name most often associated with Roman cooking is Apicius, the Roman gourmand who dined with emperors and set sail in search of the finest of foods (or so the stories go).1 Our only surviving Roman recipe book, known variously as Apicius and de re coquinaria, is attributed to this lover of luxury, but as Sally Grainger argues, this is not the case.

Grainger's book, Cooking Apicius, is not a translation of the aforementioned Roman recipe book - she does this elsewhere.  Rather, Grainger has assembled some of the best and most readily accessible recipes from that volume, omitting the overly lavish and the downright complicated.  As mentioned elsewhere, Roman recipes are often very vague and include neither measurements nor timings; here the author has, through experimentation, arrived at what she considers to be the quantities and methods most likely to work.  Some of these recipes require rather unusual ingredients such as liquamen (a variety of Roman fish sauce), defrutum (a grape must syrup), asafoetida (a resin found in Afghanistan and India), and rue, the bitter herb which we saw in the moretum recipe.  Grainger provides excellent information on procuring or making these ingredients for yourself.

My favourite bit about the book is the introduction Grainger gives on Roman cooking, and on the Apicius of the title.  She argues very convincingly that this was not the same Apicius as the gourmand mentioned above.  Roman food writers liked to talk about the origin, status, and quality of foods - they remain detached from the actual preparation, something suited to slaves and freedmen.  Grainger believes that the Apicius collection was compiled over time by cooks in the elite households - it is a text for fellow cooks.  Because the person called Apicius was renowned as a gourmand, so his name came to represent fine dining, and became attached to the recipe collection he is incorrectly assumed to have written.

This is a book I am looking to delve into, and I cannot wait to see what recipes it has in store for me.

Footnotes

1)  Athenaeus, Deipnosophistae, 1.7

Saturday, 13 October 2012

Moretum


Moretum is a cheese, garlic, and herb spread mentioned in a wonderful little poem, also called Moretum, by the poet Virgil.  The poem tells us about the farmer Symilus and his morning meal.  Waking up early he  lights his lamp and works his way to his grain stores.  He gathers his grain, mills it down into flour, and makes a bread not unlike the one we made before.  The farmer notices that he has no meat, and worries that the bread might not be tasty enough on its own, so he sets about making some moretum to go with it.  Seeing as our bread could use a little lift, I'm going to follow this Roman farmer's example and make some of this cheese spread.  The whole poem, which really is worth a read, can be found by clicking here.  It's too long to post in full, so I've summarised the important bits here:
  • Symilus gathers four heads of garlic (!), celery, parsley, rue, and coriander seeds.
  • He grinds the garlic in his mortar and pestle, and adds salt and cheese.
  • He then adds the celery, rue, parsley, and coriander seeds.  He also grabs his crotch for extra leverage with the mortar and pestle, or so Virgil says.
  • The smell is so strong that it makes his eyes water!
  • He adds some olive oil, finishes off the mixture, and slaps some on his freshly baked bread.
So, what to make of this?  Well for one there is far too much garlic; Symilus might have been able to work alone in his field without his breath offending anyone, but most of us don't have that luxury.  I'll have to tone it down a bit to prevent garlic overpowering the other ingredients.  Secondly, Virgil mentions a herb called 'rue'.  Rue is a bitter plant used to flavour lots of Roman dishes, and it grows quite freely here.  However, it is also poisonous.  Until I find a good supplier and understand it a bit better, I'll be leaving out the rue.  Finally, crotch grabbing whilst cooking is unhygienic, so I'll be leaving that bit out too.

Symilus with his packed lunch.

Virgil's Moretum

Ingredients

  • 1 Clove of Garlic
  • 1/2 of a Celery Stick (with its leaves)
  • A Small Bunch of Flat-Leaf Parsley
  • 1 tbsp of Coriander Seeds
  • A Pinch of Salt
  • Some Cheese (I used Feta as it was easy to work with.  With the benefit of hindsight, I would choose a milder cheese)
  • 1 tsp Extra Virgin Olive Oil
  • A Splash of Vinegar

Method

  • Peel the garlic, add to the mortar, and give it hell.
  • Add the salt, the cheese, and the celery to the mortar and mash them up too.  Really make sure to mix them well with the garlic from earlier.


  • To this paste, add the coriander seeds, parsley, oil, and vinegar.  I find that it is helpful to add the parsley in batches and break it down bit by bit rather than trying to do it all at once and making a mess.  Test for flavour - if it is too garlicky, add more parsley.
  • Break off a lump of bread, spread some of the moretum on, and enjoy!


Results


Moretum was a great accompaniment for my Roman bread - its creaminess complimented the 'rough' texture of the bread, and the strong flavours drew attention away from the overly wheaty taste of the bread.  In fact I'd go so far as to say that the wheaty after-taste provided by the bread was the perfect follow-on flavour for this cheese spread.  However, even though I used just one garlic clove, this spread was verging on being too strong, something not helped by the saltiness of the feta either.  Thankfully, a bit of extra parsley stopped that being so.  Despite the inadequacies of this first attempt at moretum, it is a spread which I recommend you try, and one which I am looking forward to making again.